Installation Procedure
The web based installation procedure configures the online store and imports the configuration data into the database. This is necessary to create a fully functional online store and to create an administrator that administrates the online store through the Administration Tool.
The configuration values provided by default are safe to use but may need to be changed depending on the environment of the web server.
Installing a New Online Store
The web based installation procedure is automatically started when accessing the online store through a web browser. This can be achieved by entering the WWW address of osCommerce Online Merchant installation in your browser.
For example:
http://www.shinyredapples.com/catalog/
osCommerce Online Merchant automatically detects if the installation has already been completed and redirects to the installation procedure if it has not yet been performed.
Step 1: Welcome Page
The first step is the welcome page shown in Figure 1 which displays the current recommended configuration settings for PHP.
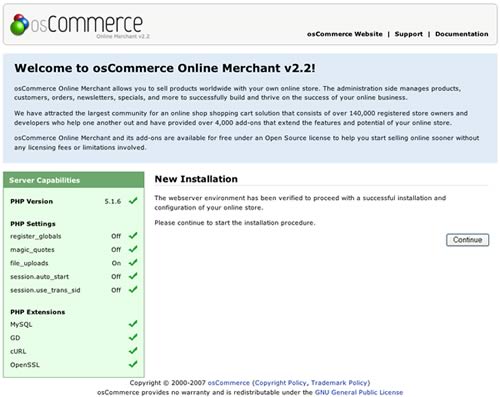
Figure 1. Welcome Page
It is recommended to update a PHP configuration value, or to install and activate a PHP extension, if it is marked against the recommended setting.
Step 2: Database Server
The second step shown in Figure 2a sets the database connection parameters to successfully connect to the database server, to import the database table structure, and to import required data.
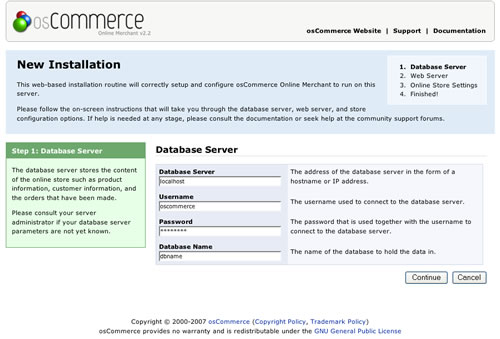
Figure 2a. Database Server Configuration
The installation procedure verifies the values entered before proceeding to the next step. If there is a problem connecting to the database server an error message is shown similar to the message shown in Figure 2b.
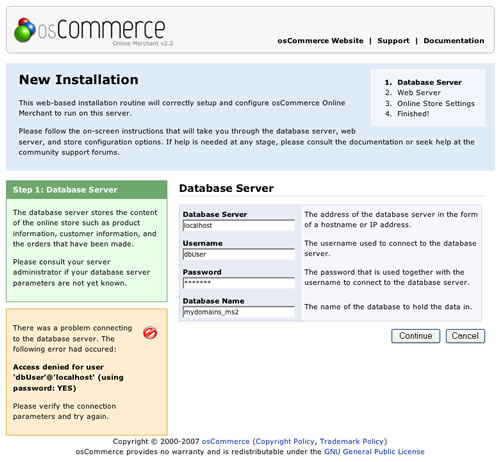
Figure 2b. Database Server Connection Error Message
Step 3: Web Server
The third step shown in Figure 3 sets the web server parameters to successfully serve the online store to users.
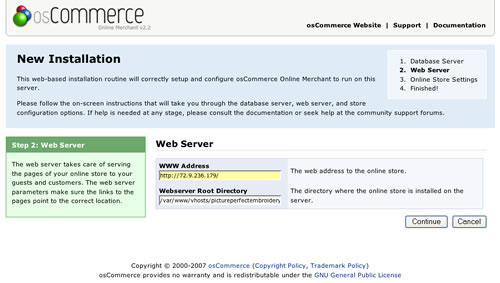
Figure 3. Web Server Configuration
Step 4: Online Store Settings
The fourth step shown in Figure 4 sets the store owner and administrator settings for the online store.
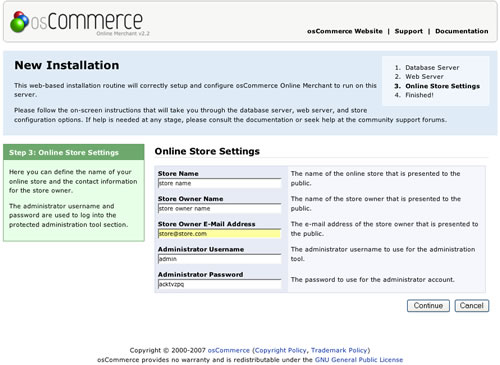
Figure 4. Store Owner Settings
It is important to keep note of the administrator username and password as these are used to login and to access the Administration Tool.
Step 5: Finished!
The last step in the installation procedure stores the database server and web server parameters to the configuration file on the web server. On successfully saving the configuration file, the installation procedure is finalized and the online store is ready to be used as shown on Figure 5.
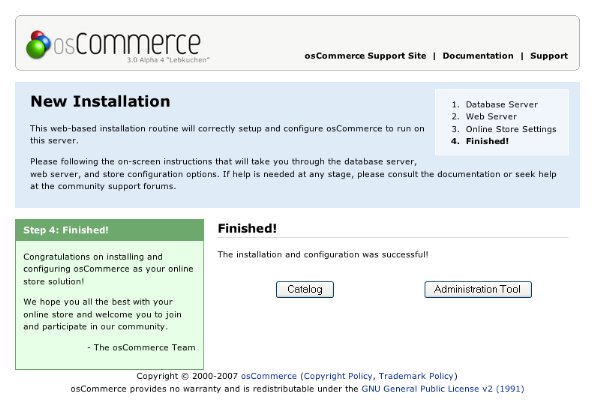
Figure 5. Successful Installation Confirmation